All guides
Connect OneTake to OBS (WebSocket setup)
OneTake drives OBS through the WebSocket server that ships inside OBS Studio 28 and newer — no plugin to install, nothing about your scenes changes. You enable it once, hand OneTake the password, and never think about it again.
7 steps · about 2 min
01
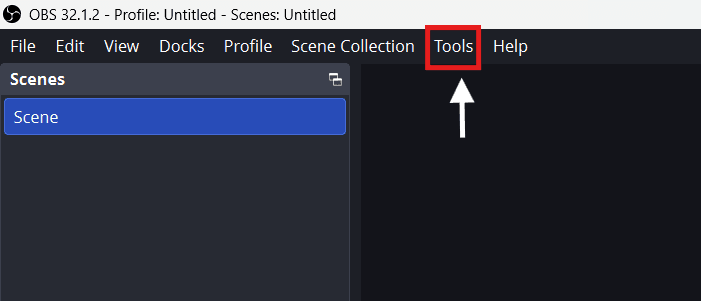
Open the Tools menu in OBS
In OBS Studio, open the Tools menu in the top menu bar.
02
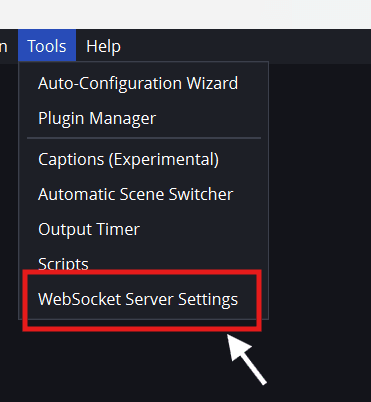
Choose "WebSocket Server Settings"
Pick WebSocket Server Settings from the Tools menu. If the entry exists, your OBS has everything built in — it ships with OBS 28+ (any 2022-or-later install).
03
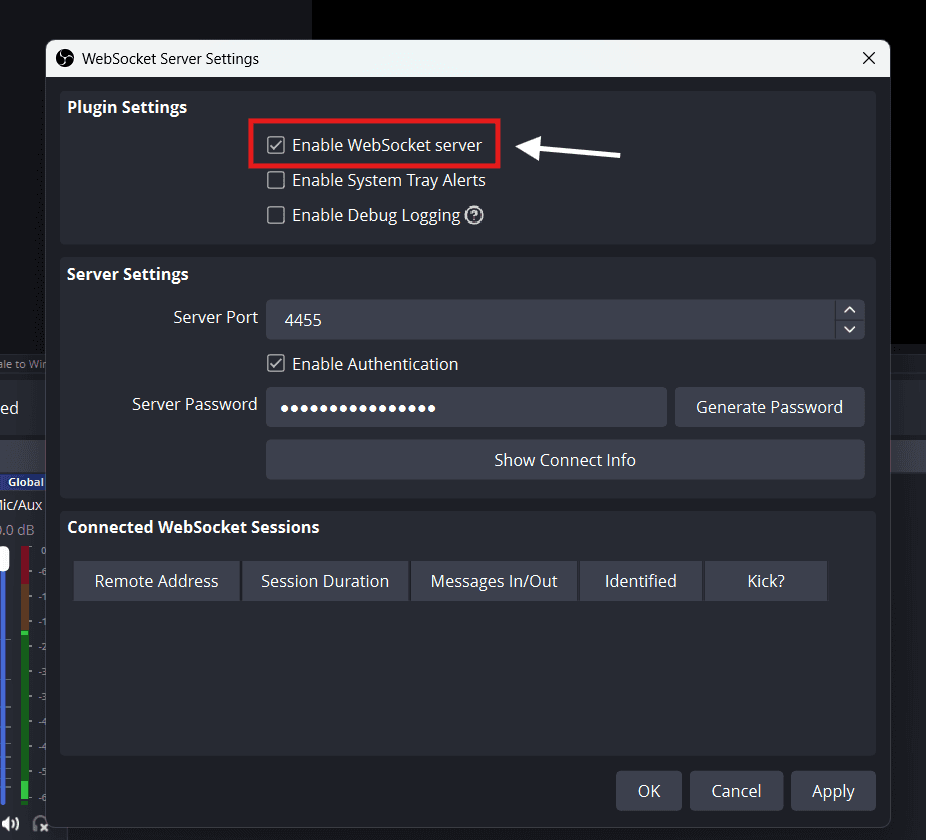
Tick "Enable WebSocket server"
In the dialog, tick Enable WebSocket server. Leave the port at its default 4455 unless something else on your machine uses it.
04
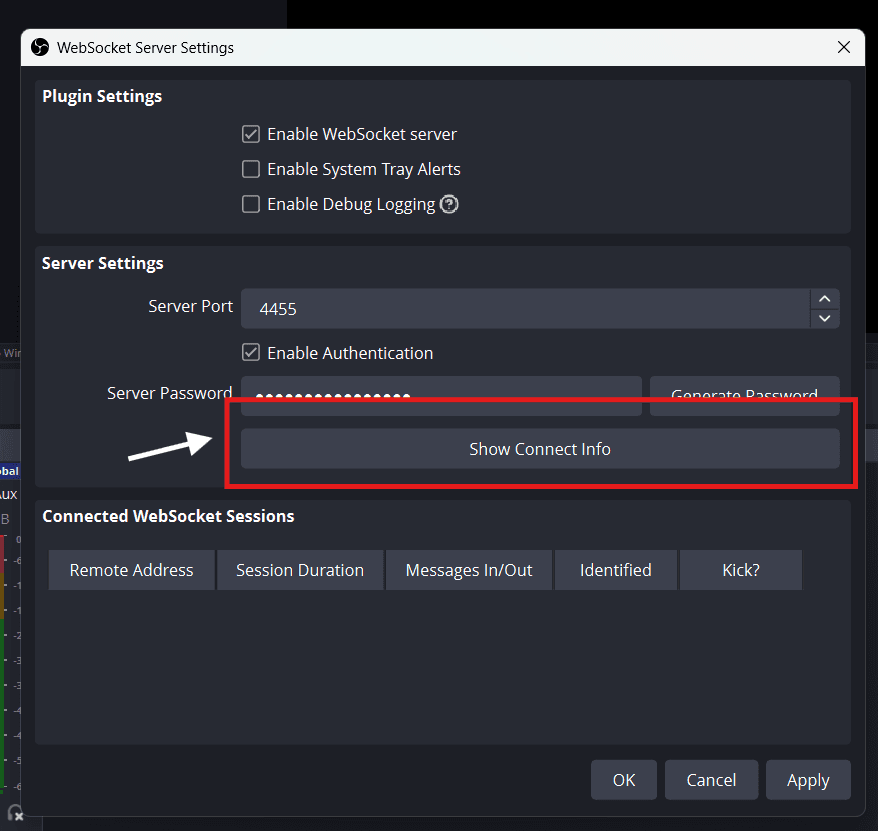
Click "Show Connect Info"
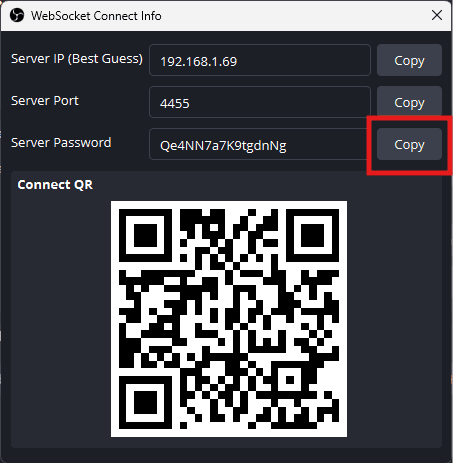
Click Show Connect Info to reveal the server's address, port and password in one panel.
05
Copy the server password
Copy the Server Password from the connect-info panel — OneTake needs it once.
06
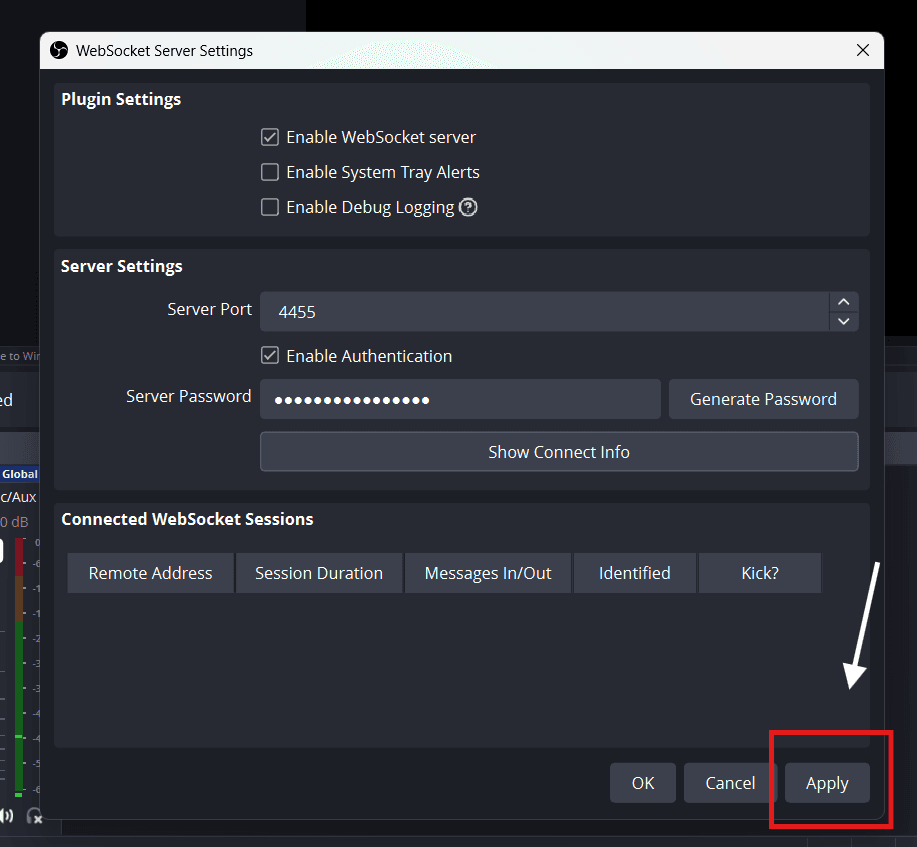
Apply to save
Close the connect-info panel and click Apply (then OK) so OBS saves the enabled server.
07
Paste it into OneTake and hit Connect
In OneTake’s Connect page, enter the host (
localhost if OBS runs on the same machine), the port (4455) and the password you copied, then hit Connect. The overlay turns live and mirrors your OBS status from here on — OneTake remembers the connection, so this whole guide happens exactly once. Try the same flow right now in the live demo.Recording quality stays 100% yours
OneTake never touches your scenes, sources or encoder settings — it only starts, pauses and marks cuts over the WebSocket. Everything you’ve tuned in OBS keeps deciding how your video looks; see our recommended OBS recording settings if you want a solid baseline.
Try it before you buy it
The complete app runs as a live demo in your browser — walk the whole workflow first, then pay once and own it.